Well trendy photos and that

Wednesday 4 June 2014

Misty the mixte

This post has been a long time coming. It's been over a year since I bought two bikes from The Guildford Bike Project by way of eBay; one being the Halfords Commodore, and the other being a very tired looking Raleigh 5-speed that looked like it had been left outside in the river. 
I'll be honest, this post is finally coming about because not only have I done up the Raleigh Misty, but I'm selling her on eBay. Read on for a full drawn out year of messinaboutin', and then bid like it's Monopoly money.


All this could be yours!

The years have taken their toll on Misty. The years and the rust. I don't know what leaky garage this bike came from, but it sure hadn't aged well. Originally it seems it started out life a 5-speed town bike with a stem mounted shifter. Cottered cranks with a freewheel at the back, a notable feature was the old-style rear derailleur, which instead of mounting to a derailleur hanger as we see today, it mounted inside the horizontal dropout, behind the nutted axle of the rear wheel (Shimano still make the Tourney, a version which still uses it's own hanger to mount to standard horizontal dropouts).


The Raleigh Misty - Where even the rust is rusty

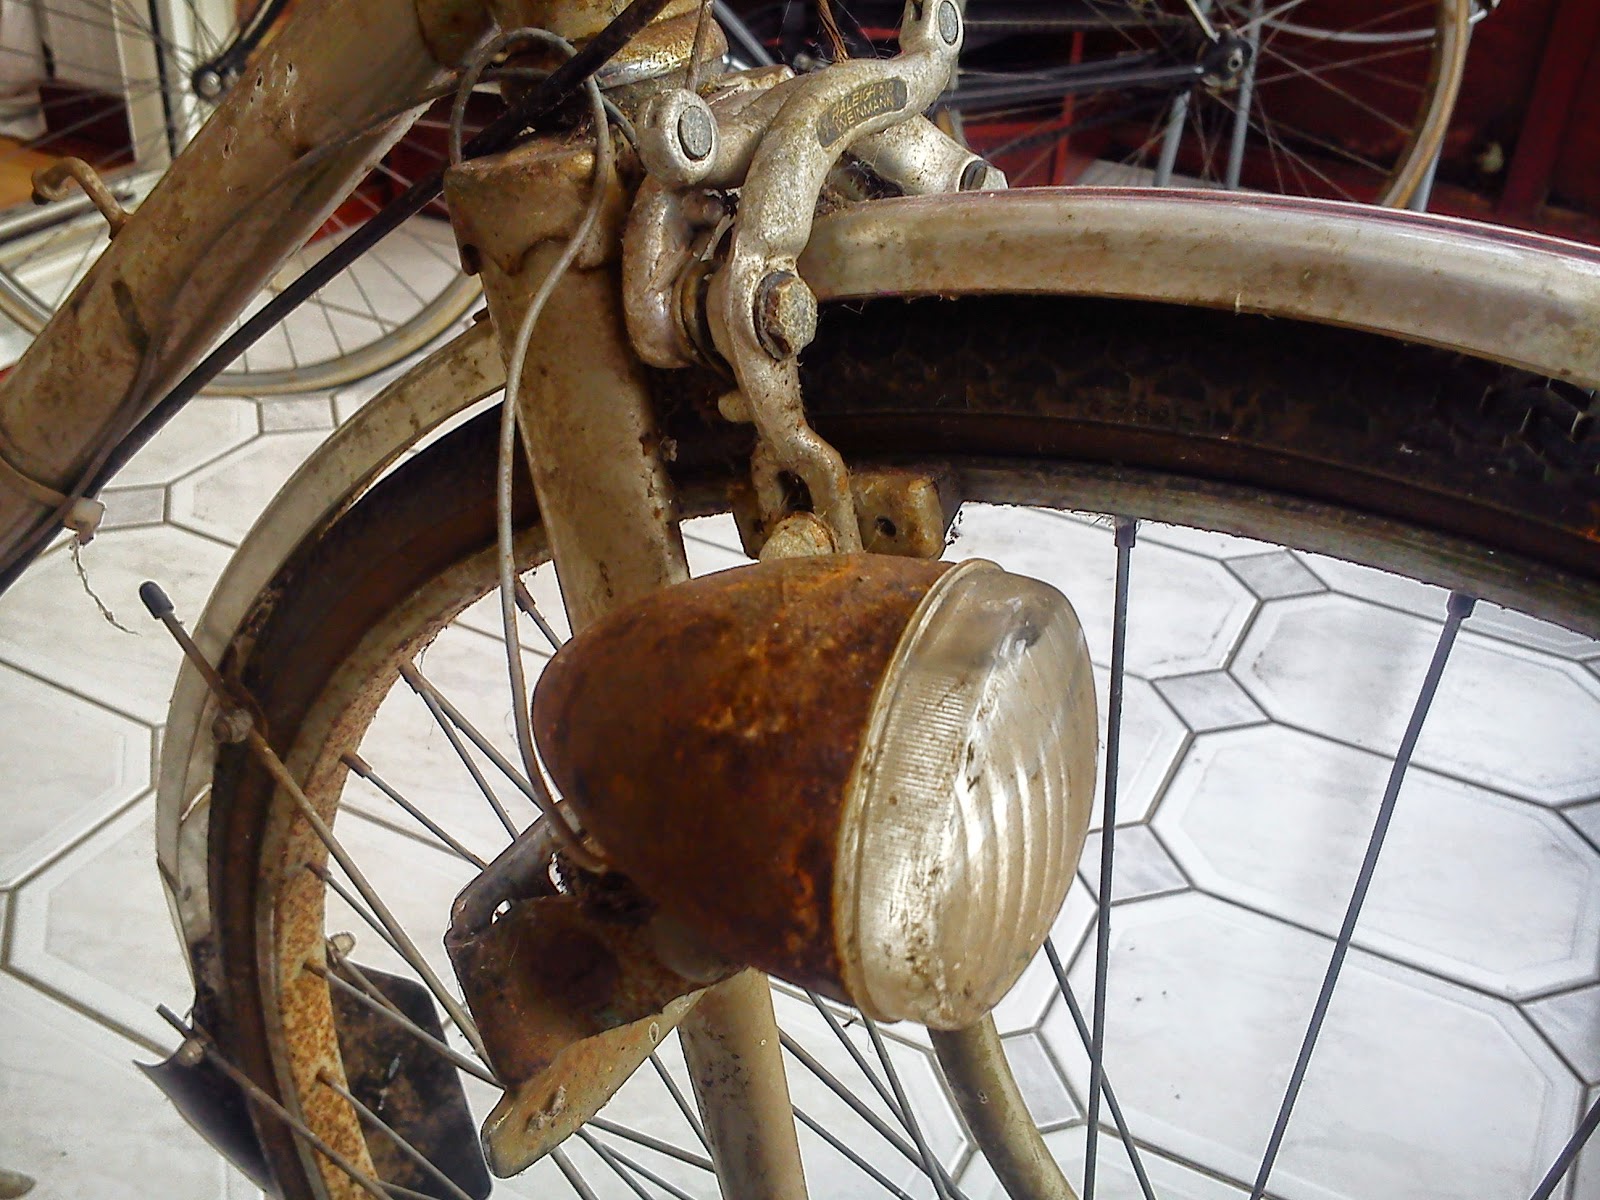
The bike came with all the usual old-style town bike accessories (dynamo lights; mudguards; pannier rack) but most of it was rusted or cracked to the point it wasn't worth saving (I'm still in two minds as to whether I should mod the bullet lights to take an LED lamp, although there's not a spot of chrome left on either... the rust would have to be a feature!).
The wheels too were in a bad way; the steel rims were more rustpit than chrome, and the tyres felt like cardboard. The alloy components were dirty, but nothing a lot of steel wool, WD40, beer and patience wouldn't fix.


This is the same mudguard I had shotblasted along with Joonya; although I considered waxing it up and leaving it on the Misty, it looked dull and out of place against the chrome cranks and handlebars

So all in all, the bike was a rusty heap of shit. Harry, the mate who had made light work of stripping down the Commodore, seemed dismayed that I wanted to carry on with the task of doing it up; especially when I turned down his suggested alternative of throwing the bike around the garden for fun.


Surface rust galore

So, to work I went stripping the bike down. To be fair, I was surprised at how not-grimy this bike was. Don't get me wrong it was filthy, but this was clearly a bike that was put away clean, before being waterboarded for decades. 
The corrosion made up for the grime though, as did the billion dead spider eggs waiting for me in the handlebars. As I worked my way through every sheared bolt head and rounded nut (it seems age makes for a great threadlock), I finally ended up with three piles; "Shit to clean and keep on the bike", "Shit to clean and keep in the spares box", and "Shit to bin".

Shit to clean and keep on the bike:
  • Frame with cottered crankset and bottom bracket still attached (oh, we'll get to that in a later post)
  • Raleigh-Weinmann 610 and 750 centre pull brakes
  • Weinmann brake levers
  • Sturmey Archer front hub
  • Sturmey Archer rear freewheel hub
  • Headset
Shit to clean and keep in the spares box:
  • Chaincover
  • Pedals
  • Bullet lights
  • Raleigh 60mm quill stem
  • Black plastic Brooks saddle
  • Seat post
  • Handlebars
  • Shimano 5-speed freewheel
  • Pannier rack
  • Kickstand
Shit to bin:
  • Tyres (dry as balls)
  • Inner Tubes (dry as balls)
  • Rims (rusty as balls)
  • Spokes (corroded as balls)
  • Suntour rear derraileur (stiff and corroded as balls)
  • All the cables (rotten as balls)
  • Chain (stiff and rusty as balls)
  • Mudgaurds (cracked as balls)
  • Plastic stem mounted gear shifter (snapped as balls) 
  • Grips (rubbish as balls)
  • Dynamo (not working as balls)
 So as I looked at the piles, I could work out what was to happen to Misty; the best way to show off the mixte frame was to strip it right down (no mudguards, no pannier), and make it a single speed (no derrailuer, and - call it kismet - no freewheel; Joonya's 14-24t Regina Corsa freewheel was knackering me out, so Misty's 14-28t Shimano freewheel was perfect for dragging my arse up and over hills). The 70mm stem seemed a little short for a stormtrooper, so was donated to the Commodore.

The crankset and bottom bracket were eventually removed (like I said; later post), so I sent the frame off to be powdercoated at Armourtex Cycles in Hackney. I wanted this to be a really muted bike - completely the opposite of the workhorse death machine that is Mighty Martha II - so I decided on RAL 6019 Pastel Green. Completed with some cream Schwalbe tyres and a brown saddle, I think Misty carries it off perfectly, like a bike made of ice cream.


Like a mint neapolitan

I wasn't fond of the original handlebars (they looked and felt uncomfortable, in some odd limbo between flat bars and what they are now), so changed up to a pair of Humpert Stuttgarters, which sweep back more with a little bit of rise. 

Humpert Stuttgarters, bought from Practical Cycles via eBay

 I wanted to keep the quill stem angle the same for a 'gull wing effect', but it needed to be longer (80mm); not only does it look better but it makes for less twitchy steering.

System EX 80mm stem

The brake levers cleaned up beautifully, and were laced up with Jagwire brake cables, with a 'braided silver' coloured outer sleeve.

Original Weinmann levers

I really wanted some yellow grips that didn't look overly modern, so 'made' some short grips out of a roll of handlebar tape. 


The chrome on the headset's a little pitted, but the alloy brakes cleaned up grand

As usual, the Weinmann brakes also cleaned up great. I bought new yokes and straddles as the originals were looking pretty tired. The original brake blocks were thrown out; I used the ones that came with Mighty Martha II's Avid V-Brakes.


Should've just mounted two sets of rear brake

Because of the mixte frame's shape, there are two places to mount the rear brake. Originally the highest mount would have conflicted with the pannier rack, and without the rack the pannier mounts are left on show and are a little ugly. The lower mount however, comes with a more natural feeling way to route the rear brake cable. Plus, it seems more novel to have the brake yoke straddle the seat tube. 

Brown vinyl saddle, again from eBay
 I got the brown vinyl rivet saddle from eBay, along with the Valvert seatpost.


Make sure the freewheel is this way around, or there'll be tears!

The 17t single speed freewheel came from good old eBay (buyer beware: I almost learnt the hard way that the manufacturer's stamp is on the opposite side to the removal splines; if the freewheel was screwed on with the manufacturer's stamp facing outward (as is usual), the splines would be on the inside, and thus pointless. I didn't fall for this as I do well smart).
The chain is originally the 7 speed chain from Mighty Martha II, back before she was mighty. I know it's not 'proper' to have a 7 speed chain on a single speed, but Misty's original chain wasn't up to much in the way of moving, and I didn't want to spend even more on this build when there was a perfectly good chain in the spares box. 


Misty's crankset

The original cottered crankset was cleaned up, with only a couple of pitting marks on the crank arm. Even if they weren't rusty as hell, the chunky rubber pedals didn't go with this Misty reborn, so some alloy quill pedals were sourced from eBay. 


Sturmey Archer freewheel hub

As for the wheelset, I kept the Sturmey Archer hubs, and laced them into some 30mm deep 700c rims. The rest of the bike was a traditonal, vintage bike rebuild; the 43mm deep Swift Arriv rims 30mm Velocity rims* (a la Polish seller on eBay) were just to keep it modern enough to be eyecatching.

As much rim as there is tyre

The rims are wrapped in cream 700c x 32mm Schwalbe Delta Cruisers. I'll be honest, if this was to a budget, I couldn't have used these tyres, but then they look lovely and I'm a pushover...

The wheels were laced with stainless steel spokes from SpokeSave

Half of the front bearings had to be replaced; the balls were rusted on one side, presumably because it wasn't tightened up properly. This is understandable as the cone/axle situation on both hubs is a weird one; the fixed cone side of the axle doesn't have spanner markings, and therefore can't be tightened unless you use mole-grips or a vice. Pretty annoying to come across, and has never rolled right compared to standard hubs it has to be said. It's not that it's not a smooth roll once it's going, it's that it seems to stop rolling too early.

Deeeeep V's

Saying that, once on the bike, it's a pretty smooth ride. I've only taken it out for a spin once up and down the street, but it was lovely. The gearing seems to be be perfect for the flat streets around my house, and if I had more space and less Martha, I'd keep it.   


The loveliest town bike

So there you have it; from rusty champagne to mint ice-cream. Like I mentioned at the start, I'm selling Misty on eBay, so you can go mad and bid on it if you like

*Note: I had it in my head they were 30mm deep Velocity rims, but they are in fact 43mm deep "Swift Arriv" rims with the stickers removed. I bought them here

Friday 30 May 2014

Like water off a duck's bike

It's been a hectic 2 months recently, so not much time to messabout with bikes. Made up for it this week by finishing and photographing the Raleigh Misty ready to put on eBay (post to follow soon), and fiiiiinally getting round to waxing/waterproofing Joonya up good. I'd sanded and polished the frame a week or two ago, but only got round to putting the Ankor-Wax on yesterday. 

I didn't take a picture of the wax on the frame unbuffed, but suffice to say it comes out of the can looking like liquid toffee, and stinks of solvent. I poured some (too much) into a bowl, then used a rag to slather the frame. Out of the can it was the consistency of ketchup, so it was easy to get into all the little edges of the lugs etc. 
After leaving it about half an hour, the wax had dried to the consistency of butter, and the excess could be wiped away without fear of getting rid of everything. Half an hour after that I buffed it up with an old dish towel. It was tacky and picked up a lot of the fluff from the towel, but after a good buff it was back to being all shiny and nice, with the slightly rubbery texture of the wax coat.

With this being a surprisingly easy job, I decided to have a go at fitting the headset. The cups went in fine with a couple of careful taps of a wooden mallet. The crown race was an absolute dick though, and took a lot of whacking with a pipe, and filing of the fork to get it on. Filing the fork is always sketchy; if you're not even all the way round, the race won't sit level on the fork. Anyway, it's on and level now, so we're good. 

Ritchey headset cups

 So with the headset in, I mocked up the stem and handlebars (no real reason, except I was getting a bit excited).

There's nothing like white bedding to catch all the dirt from a bike build

 The stem is a Cinelli Frog. Obviously there's not much design variation when talking quill stems, so when I saw the Frog I had to have it. It looks so hench! The clamp plate was originally silver, and the stem had a rubbish silver frog down the side, so I painted over it all (needs another coat though), to keep all the components a pretty solid black. The middle section of the handlebars (Cinelli Ergo 66's) will also need painting black, although I don't need to go mad as handlebar tape will cover most of it.

Cinelli stem and handlebars. Incredibly light compared to my old steel bars!

So with the headset in and the stem and handlebars on, I decided to try fit the bottom bracket. Bit of a silly idea as the BB shell needed a good clean-out, but like I said; I was getting a bit excited. 

Then BAM! ... That bit where you ended up reeling off every swearword you can think of. 

The bottom bracket I'd decided on was a Shimano one, meant for Hollowtech II cranks (like I said before, I wanted to do up Joonya with all black, modern components). The thing with the Hollowtech set up is, instead of having a standard square taper axle running on some bearings and cups, the axle is directly connected (and comes with) the crankset, and slots into the "adapters" (sealed bearing cups). To keep this all nice and tidy, the bottom bracket has a PVC "inner cover" that runs the width of the BB shell. 

So anyway, the good people of 1970's Viscount didn't know all this then, and left the excess of the downtube running into the BB shell. "As long as it doesn't interfere with the axle, what harm can it do?" they probably said. Over a pint that probably cost a shilling. Probably. 

Forgive the dirt; excess sand from the blasting keeps appearing from the tubes and has mixed with the wax. All clean now though. The downtube is running off and down to the right

 The downtube (and to a lesser extent the chainstay tubes) encroached way too far into the BB shell for modern-day Shimano's liking, leaving a large obstruction in the way of the inner cover of the bottom bracket.

The blimmin' downtube interfering with my blimmin' bottom bracket's bliimin' inner cover

 Measured up, the inside diameter of the BB shell is about 34mm, and the max diameter of the bottom bracket inner cover is about 32mm, which leaves 1mm clearance. The downtube intruded into the shell a fair couple of mm. At first my idea was to file the tube down flush, but I was very worried I was going to damage the threads on the shell with the file, and mess up the whole thing. It was a legitimate worry given my track record with ham-fistedly fixing things that end up more broken than they started, so I took the night to calm down and think of more swearwords. 

With one last "Shitty bastard!" expelled into the morning air, I Googled "downtube bottom bracket interference" and found others had had a similar problem (modern square taper bottom brackets are sealed, and thus take up the same amount of room in the shell as the Hollowtech one). One guy had a good experience with a Dremel, which seemed feasible and much less likely to damage the precious threads.

So a Dremel it was, and with a teeny tiny grinding wheel I set to work.

Ground down flush, then cleaned up with a small nylon wire brush attachment on the Dremel. The downtube is at the bottom

Time consuming, but relatively painless. I ground the downtube down, flush with the inner edge of the shell, then used a small emery paper cylinder on the Dremel to smooth it all out nice. I also ground down the intruding edges of the chainstay tubing, which was mostly excess brazing. I cleaned out the threads and greased it up.

The right side of the bottom bracket installed, with the inner cover showing

With the excess steel out of the way, the bottom bracket went in wonderfully. Aside from having to buy yet another proprietary fitting tool to fit it, all is well for now.

Looooooovely

I've also fitted the new/old (new to me, old to eBay) downtube shifters (Shimano Unishift), and the brakes: The brakes are Tektro R559's and although pricier than I would have liked, they're some of the only side-pull calipers I could find that would reach 700c wheels from a frame built for 27" wheels (the reach is 55-73mm). 
The only other alternative I could find was using BMX brakes, which tend to have a longer reach (almost too long), although they generally seem flimsier and look a lot more 'bare bones' than the sleeker appeal of modern roadie calipers (Read: Aesthetics).

So all in all I'm pretty bloody excited. There's still quite a lot to buy and fit to Joonya, so it'll probably be months until the next progression. The Tour De France is soon though, which usually means extended online sales for cycling shops. For now, I'm still riding around on my "Interim Ali Brifter Shitbox" which will get its own post soon; despite my scowling, it's done me well over the past months.

Friday 28 March 2014

Come quick! Joonya's been shot! (blasted)

 Like I said in the last post, I've been wanting to do Joonya up; he's served me well as a tourer for the last year, so he deserves a little tarting up. Not only that, he looks like he could lose a few pounds (this is all starting to sound a bit Gok Wan... maybe I'll hold Joonya up to a mirror when all this is done, so he can gasp and then burst into tears at how amazing mirrors are). 

 The paint job on the frame was in pretty bad shape (this being a bike from the 70's), so I figured that had to go. Replacing it however would mean a new coat of paint (or rather powder), and I couldn't pick a colour I know I'd be happy with for ever and ever. So how about no colour? Strip the paint off, but then leave it. Bare, steel tubing. Industrial; mean looking; and let's be fair; shiny and nice. Add to that all-black componentry, and you're somewhere near the bike that's in my head right now.   


 So I looked it up, and various forums showed people had either tried, or enquired about, a similar thing. One obvious pitfall brought up was that steel rusts. The main solution seemed to be a clear lacquer or powder coat over the bare metal; that seemed feasible enough, until I rang Armourtex and I was told that they'd spray the bike with some sort of (can't remember exactly what he said) primer first, so I wouldn't get the desired effect. Plus the more I looked into it, the more I read that it was highly likely the clear layer would eventually be compromised (by a chip or a crack), and the water would get in, letting rust spread under the clear coat. Any attempts to wire-wool or brillo pad this rust off, would mean compromising even more clear coat; I'd be back to where I started. 

 This one guy then explained how he'd used Ankor-Wax though. Ankor-Wax is a thick "Rust-proofing and protection system" (it's a wax, then), that seems to be mainly used on old VW's, to maintain their rustbucket patina without letting it go too far. Basically the big pro of using a wax is, although the bike will be fairly well protected for the time it spends outdoors (which is only usually once a week), if when rust does appear, I can just wire-wool it off, and reapply more wax. 

 
I could only find the Ankor-Wax in a 5 litre tub, so I'm pretty much set for life

 The main con with Ankor-Wax is apparently that it can dry thick and gets tacky in the sun; my ego is putting this down to them doing it wrong, and that I'll be able to put it on thin enough to buff it up nice. If it all goes horribly wrong, I'll be sure to post a picture of my greasy knees. 

 Anyway, I started taking the paint off with a wire wheel on my angle grinder, and it started to look pretty lovely and shiny.


The head tube/top tube lug after a spot of wire wheeling; came out pretty tasty

 The problem was, Although I could strip the main tubes, I couldn't get the grinder into the smaller corners, like up into where the seat stays join the seat tube. I could have spent a bit on getting the right tools, but after asking around I decided to go get it shotblasted at Elgamec near Aldershot.
Today was the day I picked it up, and even though I knew what to expect, I still found it pretty impressive.


Taken at the train station this morning on the way back from Elgamec. Unwrapping it on the platform like a kid at Christmas

 The funny thing was to see the brazing of the lugs and tubes in all its glory. Well, I say glory; clearly this was a braze that was meant to be hidden away from the world. I know it's a box-standard Viscount and we're not talking about Reynolds/Columbus tubing, put together by a master builder but Jesus; this ain't a pretty bike up close!


No the prettiest brazing I've ever seen, but on a dented, bent old frame like Joonya, it's sort of fitting

 The frame also has a matte sheen to it from the blasting, which leaves the surface lightly roughed up. I've no idea how matte or shiny it will be once the wax goes on, but I've decided to try polish it up a little. I'm not putting all my time and effort in to get some mirror finish, because I do think the wax will dull it a little, so I figure I'll just lightly sand it down (with very fine sandpaper and wire-wool) enough that it reflects a bit. I experimented a little today on the forks, and it doesn't take too much to bring out enough of a shine that it reflects colour.


Hard to show in a picture, but a quick polish with 600 grit sanpdpaper and steel wool on the right fork blade gave it a nice shine

 This polishing will still take time, especially in the crevices, but I figure it will be worth it, and I've definitely got time as I need to spread out the all-black parts I'm buying!

Tuesday 25 March 2014

Joonya!

  It was only once I started scrambling round my computer for photo's that I realised I hadn't really taken any of Joonya. Bought sometime in Autumn 2012, Joonya is my splendid lugged steel road bike, the Viscount Indy 500. This is the most profile shot I could find:


The only full-profile shot of the bike, not obstructed by some tit riding it

  That picture was taken about a year later in 2013, by Harry (Of Halfords Commodore stripping fame) as we and Daryl rode from Pisa, Italy to Split, Croatia last September.


  The Viscount Indy 500 is a 10 speed with a steel lugged frame fit for 27" wheels. I've no idea what components were original, or what was replaced by the previous owner, but here's how I found it:

  • Steel rimmed 27 x 1 1/4" wheels with high-flange Shimano hubs and QR skewers; 
  • 5-speed (14-16-18-21-24t) Regina Corsa freewheel;
  • SR Apex 750mm cranks with 52t & 40t chainrings;
  • Weinmann 610/750 centre-pull caliper brakes;
  • Shimano Del-50 brake levers with suicide levers;
  • Shimano 600 Rear Derailleur;
  • Shimano Uniglide 500 Front Derailleur;
  • Shimano LB-100 'ALMI' band-on downtube shifters
  The steel rims were a little bent (and they were steel), so I immediately bought some replacement alloy Rigida's from SJS Cycles, some spokes from Spoke Save, and laced up the byooootiful high flange hubs. My inexperience and naivety in the world of old 70's bikes meant that I didn't even consider changing to the modern standard 700C rims, and I just went for a straight like for like replacement. Probably fortunate though, as my brain probably wouldn't have been able to comprehend the issue of trying to get the brakes to reach a slightly smaller 700C wheel.


Oooosh; check out those flanges

  Due to the name (Indy), the running joke was to put do an abysmal stellar Sean Connery impression, and quote the line from Indiana Jones and the Holy Grail "Indy was the dog's name!".

... OK so that actually wasn't the line from the film, but my memory's poor and "We named the dog Indiana!" doesn't work as well. Either way, the Viscount became known as Joonya!, with Sean Connery's accent embedded for eternity.


 Originally when I bought the bike, it had some fairly ratty tyres, and some slowly unravelling black cloth bar tape. The tyres I straight away replaced with some cheap Michelin World Tours, and the bar tape got gaffer-taped down so it didn't flap about.

Over the next few months into early Spring 2013, a few more bits and pieces got replaced as I decided to keep it a 'traditional' old roadie:
  • New handlebar tape;
  • Some Velo Orange quill pedals with MKS toe cages and leather straps (these cages were particularly questionable due to the amount of 'toe overlap' I already had with the front wheel... something I became aware of when I clipped my toe on the tyre going round a sharp corner, which oversteered the wheel and sent me flying to meet the ground. Lesson learnt; when turning left, keep the right foot at the back/bottom and vice versa);
  • A longer Valvert seatpost so I could stretch my legs, decked out with a lurrrvely Selle San Marco Regal suede saddle, which my bum slowly buffed to a sheen over the first 1000 miles;
  • A 130mm Cinelli stem - the frame is pretty compact, so an extra 30mm gave me a more 'normal' reach for my size, plus more control (or less 'twitchiness', that can come with a shorter stem as the handlebars are closer to the headtube);
  • 27" x 32mm Continental Gatorskin tyres - Gatorskins are renowned for their resistance to punctures, and even though they were supposed to be the same size, they were a lot slimmer than the balloon tyre Michelins, which left so little clearance with the frame they rubbed at any sign of a wobbly wheel.
  My other bike was (and still is) Mighty Martha II. But if she was for getting me to work or pootling around Guildford, then Joonya was for stretching my legs as far as they'd go. I got into road biking, and spent a lot of weekends out in the South Downs, blowing out my arse trying to go up hills. It was also around this time when me, Daryl and Harry decided to take a trip out cycling later in the year; they'd already done a trip from the Hook of Holland all the way down to Nice 2 years previous, but for me this was a whole new ball game. 60-70 miles training rides were a weekly occurrence through a particularly hot summer, and I'd messed with Joonya's gears and brakes so much that I knew every little bit of chrome and alloy of that bike.

...well, except for the fact that the headtube had been bent at an angle, and I'd never once noticed...

  I only realised when the bike was in a stand and the toptube was at eye-level; the previous owner had clearly collided with something, pushing the headtube to a more vertical angle, and slightly kinking the downtube and toptube in the process. Mild panic set in as we were set to leave for Italy in a few weeks, until I realised I'd never actually known the bike to be any different; I'd dragged the bike around the home counties for hundreds of miles over the past months and it had been fine, so why worry? Joonya's a bit banged up, but he's clearly a tough old bastard.


  So, I changed the cables (Jagwire) and handlebar tape (Bontrager) to a bright yellow, and decided to tart Joonya up a bit. By this time, I'd had frame's powder coated, but I still wasn't sure what I wanted to do with this bike. So for the mean time I took to hand painting enamel bits onto it for kicks:


Sadly, it's this sort of elegant cursive that's dying out in the modern world...

  I also decided that if I was to wear a helmet (I bought one in the run up to leaving for Italy), it'd have to match:


Science has proven that the lightning bolt decal can improve both speed and acceleration, and is markedly more effective than the 'go-faster' stripes of yesteryear
  
  And so, off we went and spent 2 weeks in September cycling from Pisa, across the body of Italy via Florence and Forli (by way of the stonking Passo del Muraglione), then up and around the coast of the Adriatic, through Slovenia, and down the Dalmation coast into Split. 

Joonya: A mighty steed. Picture taken on the D54 near Obrovac, Croatia

  The whole ride was a hell of a lot of fun, and save for a few broken spokes in the rear wheel Joonya ran beautifully; we had to stay an extra night in Trieste to have the spokes changed, which due to the language barrier (and some very unhelpful, effete staff) would have been near impossible had it not been for Massimo, the bike builder extraordinaire at Cottur Giordino Sas.
Unfortunately, an old problem I'd had with my rear wheel that I'd never fixed was that there weren't enough spacers on the axle, and without a washer on the outside of the frame, the QR skewer wouldn't tighten up enough (if the washer had been on the inside of the frame, the rim would have been improperly dished, with the tyre being about 2-3mm off-centre). With all this broken spoke business, I'd misplaced the washer, and had to make a "ghetto spacer" out of electrical tape and folded paper, which lasted me all the way through Slovenia and Croatia.

Wheel fixed and true, ghetto spacer on, ready to ride another 300 miles

  Since Italy-Croatia, I've been wanting to properly 'do-up' Joonya and make him into a racier version of his old self (like putting Nike Air Max's on your Grandad); I plan to keep the Shimano parts for another project, but I can't let go of Joonya just yet.

Wednesday 19 March 2014

Mighty Martha II v2: Martha gets a new coat and loses her threads

 2013 took its toll on Martha. For one, I had a fall last spring, where I managed to twist the forks (somehow without messing up the wheel). I bent them back with a crowbar but it was never fully correct, and meant the left cantilever pad was ahead of the right. Cantilevers at the best of times are an arse to set up properly, so this just made it even harder.
Also, as I mentioned in the last post, the derailleur was always a little 'clicky' on the mid to high gears. This wasn't a huge problem, but no matter how many times I set it up, it was never 100% and always bugged me a little.
Top this off with me not taking the time to clean the dirt and grime off from daily rides through a wet autumn/winter, and she was getting to be in a bit of a state.

Mighty Martha II, before being ridden for a year more or less every day

 So, last winter I decided to take her apart, and sort out as much as I could. For one, the bottom bracket had never been serviced by me, and one of the cups had frozen into the frame over the years (to the point I couldn't get it out with PlusGas etc, and had to take it to the local shop where I get my wheels trued).
For two, I looked up the whole gears clicking thing, and diagnosed that it was because the derailleur hanger wasn't straight. The bikes had countless knocks, not to mention the time my housemate put the derailleur through the wheel, so this wasn't surprising. 
So, I got myself a Cyclus Gear Hanger Alignment tool from Wiggle. The hanger was definitely bent inwards a little, so it being a steel frame, it was just a case of carefully bending it back, using the tool as a lever.
 
 As much as I liked the Marin matte grey finish, it picked dirt up really easy and was rubbing away where I'd attached a big heavy chain lock to the top and down tubes. Plus my Halford's "Truck Bed Liner" paint job on the forks and handlebars wasn't up to much, and didn't take a lot to scratch off, exposing the steel to the elements.

The rattle can paint job wasn't doing anyone any favours, and the rough matte texture was a nightmare to keep clean
  
 So off I went to Armourtex Cycles in Hackney. I'd had one frame powder-coated by these guys before (the Raleigh Misty, which will get its own post once I've taken some pictures of it built up), and I was pretty pleased with the results. Price-wise, it doesn't seem much different from other places I've been to (£77 for a colour coat and then a coat of lacquer on a frame and forks), but the colour range is impressive, and they come highly recommended on most bike forums. 
Anyway, I chose a grey colour (can't remember the RAL number) and clear lacquer for the frame and handlebars. Like I said, the forks were twisted, so I decided to replace them.

 Another bugbear with the frame was the rising quill stem. Basically I think it's ugly as shit, and was the thing stopping my handlebars from being even lower. 
 
The original Marin quill stem, the dirty mess that it is

 A good looking quill stem for a 1 1/8" steerer is hard to come by, and one that has an acute angle like that on a 1" road stem is rare to the point I don't even think they exist. 


This road style of stem would have been nice, but finding one to fit a 1 1/8" steerer tube is rare

 Granted, I could have used a shim to pad out the steerer tube and used one of these road quill stems, but I really don't like the idea of relying on a shim, especially if it's really only for aesthetic reasons. 

So, with forks that needed replacing, and a stem I want to send to the depths of hell, what better time to go threadless!
 I ordered some cheap, threadless Raleigh forks with cantilever bosses from Freemans Cycles. Obviously this meant the Marin's original Ritchey Logic threaded headset was redundant, so that's been relegated to the spares box, and replaced with an FSA 'The Pig' headset from Wiggle. 
The threadless stem was a little harder to come by; most newer mountain and road bike handlebars are thicker in diameter than the bars I'm using, and this change must have come around the same time that everyone went threadless. There's not much of a market for a threadless stem that clamps onto 25.4mm or 26mm bars (the standard now I think is 31.8mm). I did find a road stem in the end though (again on Wiggle); the Deda Logo. Ironically, it was the logo on it that I didn't like; a cheap looking pillow-embossed sticker that had no place on a steed such as Mighty Martha.

Uggo logo sticker (purple and silver??)

 So, I got back on eBay and found a brass button the same size diameter, filed the back off, glued it onto the face plate where the sticker had sat, then sprayed some black paint over it. 

Because it wasn't primed, the paint has run off the skull and crossbones profile, which I think looks pretty cool
  
 Thaaaat's more Martha! Now to build up the rest of the bike.

Oooooh, baby

I replaced the bottom bracket with a sealed cartridge, and I've yet to give the pannier rack a lick of paint before I stick it back on.

The truck bed paint's already starting to scratch off, but even scratched it looks less out of place than if it was the original silver/alloy colour

 Although I kept the same crank arms (and primed and painted them with the leftover Truck Bed Liner Paint), I found a 44t Stronglight track chainring on Amazon to replace the original chainrings. I also removed the front derailleur I was using as a chain guide, and added the biggest bash ring I could find for that Bolt Circle Diameter (BCD); An FSA Chain Pimp.

The indexing now works great since I straightened the hanger

I also changed the brake setup. I replaced the annoying cantilevers with some Avid Single Digit 3 V-brakes; a massive improvement in my eyes, and a hell of a lot easier to set up the pads. 

Dual compound Kool Stop MTB pads

  I also replaced the levers with some Avid Speed Dials. This was more of an aesthetic decision as they're black and not silver. 

For me the 'speed dial' seems a bit of a gimmick; i don't really see much of a different in the lever action
 
I'm pretty sure the fascination with the skull and crossbone came from Danny from the Bash Street Kids' jumper
  
I also replaced the cables, and added some rubber skull-shaped (naturally) lights from On One/Planet X to the frame; they're not great (I've used them before and they tend to fail after a short time, especially when wet), but they're very cheap and make for good emergency lighting if I get caught short without my normal lights. Also (I hope I don't jinx myself), I've found that because they blend into the bike, they're less likely to be stolen.


  So, Mighty Martha II rides again. I think I've addressed every issue I had with the original build, and for me, we're nearing perfect bike status. Aggressive as hell, fast when it comes to it, but still comfortable and practical in a city. The styling is pretty divisive between my friends, but sod them, it's clearly cool as shit.