Well trendy photos and that

Wednesday, 19 March 2014

Mighty Martha II v2: Martha gets a new coat and loses her threads

 2013 took its toll on Martha. For one, I had a fall last spring, where I managed to twist the forks (somehow without messing up the wheel). I bent them back with a crowbar but it was never fully correct, and meant the left cantilever pad was ahead of the right. Cantilevers at the best of times are an arse to set up properly, so this just made it even harder.
Also, as I mentioned in the last post, the derailleur was always a little 'clicky' on the mid to high gears. This wasn't a huge problem, but no matter how many times I set it up, it was never 100% and always bugged me a little.
Top this off with me not taking the time to clean the dirt and grime off from daily rides through a wet autumn/winter, and she was getting to be in a bit of a state.

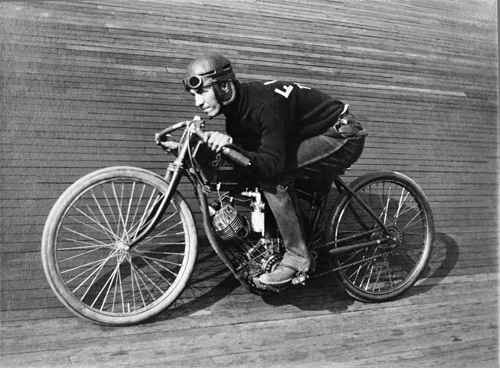
Mighty Martha II, before being ridden for a year more or less every day

 So, last winter I decided to take her apart, and sort out as much as I could. For one, the bottom bracket had never been serviced by me, and one of the cups had frozen into the frame over the years (to the point I couldn't get it out with PlusGas etc, and had to take it to the local shop where I get my wheels trued).
For two, I looked up the whole gears clicking thing, and diagnosed that it was because the derailleur hanger wasn't straight. The bikes had countless knocks, not to mention the time my housemate put the derailleur through the wheel, so this wasn't surprising. 
So, I got myself a Cyclus Gear Hanger Alignment tool from Wiggle. The hanger was definitely bent inwards a little, so it being a steel frame, it was just a case of carefully bending it back, using the tool as a lever.
 
 As much as I liked the Marin matte grey finish, it picked dirt up really easy and was rubbing away where I'd attached a big heavy chain lock to the top and down tubes. Plus my Halford's "Truck Bed Liner" paint job on the forks and handlebars wasn't up to much, and didn't take a lot to scratch off, exposing the steel to the elements.

The rattle can paint job wasn't doing anyone any favours, and the rough matte texture was a nightmare to keep clean
  
 So off I went to Armourtex Cycles in Hackney. I'd had one frame powder-coated by these guys before (the Raleigh Misty, which will get its own post once I've taken some pictures of it built up), and I was pretty pleased with the results. Price-wise, it doesn't seem much different from other places I've been to (£77 for a colour coat and then a coat of lacquer on a frame and forks), but the colour range is impressive, and they come highly recommended on most bike forums. 
Anyway, I chose a grey colour (can't remember the RAL number) and clear lacquer for the frame and handlebars. Like I said, the forks were twisted, so I decided to replace them.

 Another bugbear with the frame was the rising quill stem. Basically I think it's ugly as shit, and was the thing stopping my handlebars from being even lower. 
 
The original Marin quill stem, the dirty mess that it is

 A good looking quill stem for a 1 1/8" steerer is hard to come by, and one that has an acute angle like that on a 1" road stem is rare to the point I don't even think they exist. 


This road style of stem would have been nice, but finding one to fit a 1 1/8" steerer tube is rare

 Granted, I could have used a shim to pad out the steerer tube and used one of these road quill stems, but I really don't like the idea of relying on a shim, especially if it's really only for aesthetic reasons. 

So, with forks that needed replacing, and a stem I want to send to the depths of hell, what better time to go threadless!
 I ordered some cheap, threadless Raleigh forks with cantilever bosses from Freemans Cycles. Obviously this meant the Marin's original Ritchey Logic threaded headset was redundant, so that's been relegated to the spares box, and replaced with an FSA 'The Pig' headset from Wiggle. 
The threadless stem was a little harder to come by; most newer mountain and road bike handlebars are thicker in diameter than the bars I'm using, and this change must have come around the same time that everyone went threadless. There's not much of a market for a threadless stem that clamps onto 25.4mm or 26mm bars (the standard now I think is 31.8mm). I did find a road stem in the end though (again on Wiggle); the Deda Logo. Ironically, it was the logo on it that I didn't like; a cheap looking pillow-embossed sticker that had no place on a steed such as Mighty Martha.

Uggo logo sticker (purple and silver??)

 So, I got back on eBay and found a brass button the same size diameter, filed the back off, glued it onto the face plate where the sticker had sat, then sprayed some black paint over it. 

Because it wasn't primed, the paint has run off the skull and crossbones profile, which I think looks pretty cool
  
 Thaaaat's more Martha! Now to build up the rest of the bike.

Oooooh, baby

I replaced the bottom bracket with a sealed cartridge, and I've yet to give the pannier rack a lick of paint before I stick it back on.

The truck bed paint's already starting to scratch off, but even scratched it looks less out of place than if it was the original silver/alloy colour

 Although I kept the same crank arms (and primed and painted them with the leftover Truck Bed Liner Paint), I found a 44t Stronglight track chainring on Amazon to replace the original chainrings. I also removed the front derailleur I was using as a chain guide, and added the biggest bash ring I could find for that Bolt Circle Diameter (BCD); An FSA Chain Pimp.

The indexing now works great since I straightened the hanger

I also changed the brake setup. I replaced the annoying cantilevers with some Avid Single Digit 3 V-brakes; a massive improvement in my eyes, and a hell of a lot easier to set up the pads. 

Dual compound Kool Stop MTB pads

  I also replaced the levers with some Avid Speed Dials. This was more of an aesthetic decision as they're black and not silver. 

For me the 'speed dial' seems a bit of a gimmick; i don't really see much of a different in the lever action
 
I'm pretty sure the fascination with the skull and crossbone came from Danny from the Bash Street Kids' jumper
  
I also replaced the cables, and added some rubber skull-shaped (naturally) lights from On One/Planet X to the frame; they're not great (I've used them before and they tend to fail after a short time, especially when wet), but they're very cheap and make for good emergency lighting if I get caught short without my normal lights. Also (I hope I don't jinx myself), I've found that because they blend into the bike, they're less likely to be stolen.


  So, Mighty Martha II rides again. I think I've addressed every issue I had with the original build, and for me, we're nearing perfect bike status. Aggressive as hell, fast when it comes to it, but still comfortable and practical in a city. The styling is pretty divisive between my friends, but sod them, it's clearly cool as shit.  

Friday, 14 March 2014

Mighty Martha II: The marvelous Marin and mother of the messinaboutin'

 When I moved to Guildford 2 years ago, I either had to walk everywhere or take the bus. The walk to work takes 25 minutes. To the supermarket takes 45. I decided to get a cheap bike off eBay (of course) to speed up the situation. I can't remember where I went to pick it up, but I got a steel frame Marin Palisades mountain bike from the early 90's ('92 I think).


The '92 Marin Catalogue page for the Palisades Trail

 I didn't take any pictures of it, as I didn't realise I was going to get so into bikes, but here's the original picture from the eBay listing:


The original eBay picture

 I specifically remember the ride back home from the train station, laughing to myself at how walking was for chumps.


The bike itself was OK for the me back then; it started; it stopped; it turned; it was all I needed. Over the last two years I've become such a snob that I'd probably have to adjust and oil everything before I sat on it.

 The tyres were rotting away so they were the first thing to be replaced, and then the crappy plastic cantilever brakes. Then one of the crappy plastic pedals split down the spindle and I replaced them with huge FireEye platform pedals.

As you can see from the above picture the saddle was torn up, so that and the seatpost got replaced next with a swish San Marco Rolls saddle; the brass trim couldn't have looked more out of place on a luminous green and matte grey mountain bike frame, but by then I had some ideas forming about what I wanted this bike to be.
Then came the pannier rack so I didn't have to carry my shopping back home in a hiking rucksack (Godsend).

 The gears never really worked properly and were always skipping so I used it more like a single speed. Something in the left gear shifter had snapped so I never changed the front rings anyway.

I remember the sad, sorry night a month or two after I bought it, when my housemate borrowed the bike to nip to the shops. I'd forgotten to tell him to be careful changing gear, and a few minutes later he dragged the bike back in the house. He'd tried changing down gears, and the 'low stop' on the rear derailleur had been way off. The derailleur had gone into the wheel, and the spokes had pulled it all the way round. I was back to walking around like a chump for a few days...

 I ordered a cheap Shimano Alivio derailleur, and fit it to the bike to the instruction. It never worked quite right in the mid to high gears, but at least the stops were set!


 So I started getting a taste for replacing parts, and generally speaking, bike messinaboutin'.

By summer, I'd decided to radically change the bike; It was a work bike I used on some relatively flat roads. I had no use for such low gears, and as I'd got fitter I started getting a bit addicted to the speed I could put out. My saddle was getting higher and higher and I was constantly grinding away in my top gear, but I was still on a crappy old mountain bike. I needed to be faster and lower and cooler and better.

 At around the same time, I was going to custom motorbike mags and sites for inspiration. Fridays after work were set aside for beer and BSH. I've always loved the old-style custom bobber look on a motorbike, but it'd have me sat a little too comfortable if I wanted any speed out of a bicycle. There was the cafe racer look, but it was a little too clean for me. Then I came across pictures of old boardtrack racers from the 20's.


Boardtrackers were used to race round a track ... made of boards

It was perfect. It was bloody perfect. The stance was low down enough that I could really stretch out and have a proper go pedalling; and it was from a time when motorbikes actually resembled bicycles. I got to work sorting out parts.

 I'm obviously not the first person to try this (Rat Rod Bikes can attest to that), so parts were easy to come by once I knew where to look. 

The main change in the shape of the bike was the handlebars; they almost look like shallow, splayed out dropbars. I found out through blogs like Lovely Bicycle! that the best way to do this was to get some normal old cruiser handlebars and turn them upside down. 


A mock up of the bars I'd bought; these to be precise


The cables weren't long enough for the brake levers to bit on the bars, so my trial run around the garden was "interesting"... 

I was on my way, but still needed  to sort out the colour. The matte grey was great, but the luminous green had to go; I stripped the paint with a wire wheel, and primed and repainted the forks, handlebars and stem with black 'truck bed paint', a hard wearing paint that has a gritty matte texture.

Next the wheels; I wanted this bike to be aggressive but also bombproof, so I bought some 32mm wide DMR Dee-Vee rims, and Shimano SLX hubs. Before I laced the wheels up, I'd decided to repaint the rims. These being for rim brakes and not disc brakes, I'd heard that you shouldn't paint the braking surface as it becomes too slippy. So I decided that I needed to take the black anodized layer off, before masking them up to be primed and painted.

Looking back now, why I wasted so much time and effort wet-sanding off a perfectly good (and new) anodized layer is beyond me; by rubbing away at the braking surface, I've drastically reduced the lifespan of the rims.
Anyway, you live and learn. I repainted the main rim body cherry red before lacing up the wheels, and wrapping them in some 2.125 inch whitewalls I'd found on a German custom bike site called Classic Cycle (the same site I'd got the bars from).


Heavy as shit but byooootiful

Like I said before, I had no use for a mountain bike's gear range, so I decided to just forgo the triple chainring and keep the bike on a single chainring setup. To give myself more variation, I went for a 10 speed, 11-36t cassette, with a Shimano Zee shifter and Deore rear derailleur.   

So I was more or less ready to go, I just had to buy some grips (black, old school BMX style 'Toad Stool's), some brake levers (Shimano V-Brake), cabling, and a thinner Shimano Deore 10 speed chain (even though it's worked fine for 2 years, I regret this; Shimano use their patented "Hollowtech" chain pins which you're not supposed to remove, and you can only connect the chain up with their one-time-use solid pins. My next chain will be a KMC, because at least with their quick links, you can remove the chain without a chaintool, and don't need extra bits).


Mighty Martha II: The greatest workhorse around

After 6 hours of fiddling and swearing, I got the bike built. 
I switched the big and medium chainrings around so the biggest was more central, and kept the disconnected front derailleur as a chain guide (just moved the 'low stop' way up).


About an hour old in this picture, and already the whitewalls are smudged...

Riding it to work the next day was incredible. I'd had hardly any sleep the night before (I think I went to sleep at 4 in the morning), and it was the Friday work closed for Christmas. 21st December 2012; the day the world was supposed to end. At least I'd have gone out in style!


I named her Mighty Martha II. The first Martha was an inflatable whale I'd taken camping up at lake Coniston, who dissappeared one night never to return...
Anyway, I intended on having some vinyl cut, so I could lay the name on the top tube. The local signage company I contacted didn't seem too interested in such a small job, and I forgot/lost interest. Maybe someday.


I rode Martha around for all of 2013, and she is AMAZING. Heavy as hell thanks to the steel frame and tyres, but pretty fast if I say so myself. The fat tyres also mean it's very stable taking corners with a lean on, which makes it so fun to ride.
As for the position, I find it the most comfortable bike I've ever ridden (on short journeys). It's aggressive enough that a lot of weight rests on your hands, but the bars are wide enough that I can pull at them when I want to get going.
Saying that; 10 miles or so of being slumped over does give me some back ache, so I try to keep it to short journeys, and use my roadie for anything over 10. 

The original paint job has taken a battering though (23 years old!), as did my (poorly) painted forks and handlebars. This being a steel bike, rust is a problem, so this last winter I've upgraded the whole thing, including powder coating the frame. That's Mighty Martha II v2 though, and a post for another time.

Wednesday, 12 March 2014

DON'T GIVE UP THE SHIP, COMMODORE HAZARD

 So as explained previously, this time last year I was picking up two tired old bikes to mess with. One of these was the Halfords Commodore. 


COMMODOOOORRE!!
 It cost me £16, and if I wasn't such a pansy, I could've probably ridden it away (albeit on flat tyres). That's a bargain for any bike, but just look at it! Golden foil decals, steel lugged frame, solid no-nonsense Sturmey Archer gears ... it's worth £16 just for the sexy brass coloured mudguards! Proper regal looking. No wonder it's called the Commodore. 


This Downton Abbey looking bastard is Commodore Oliver Hazard Perry of the US Navy: His middle name's Hazard, he's a direct descendant of William Wallace, and his flagship was the USS Lawrence, who's battle flag simply read "DON'T GIVE UP THE SHIP". If Halfords had a Commodore in mind when designing this bike, I'm banking on it being this guy

 The parts on the bike are all pretty standard looking, although clearly this was never meant to be a performance bike, and to it's credit everything was in working order (aside from the gear hub, which was disconnected and thus resting in its highest gear).  

The brakes are of a flimsy side-pull variety I've seen before on old 3-speed town bikes, and the wheels are 26 x 1 1/4 steel. 


Steel rims make for poor braking, and RUBBISH skids

 If you've ever tried braking on steel rims, you'll know it's not exactly responsive compared to alloy rims. Granted, for a slow-moving town bike you can get used to planning ahead and increasing your stopping distance on the road, but the first time you try brake in the wet, or try an emergency stop, you really question why you've been given brake levers at all.


 So, the first thing I did was get online and figure out how to alleviate the situation. I first bought some 'leather faced' pads (standard rubber blocks with a strip of leather running through the middle) that were specifically made for steel rimmed wheels, but I found these to be as crappy and ineffective as the previous blocks. I then ended up getting some Kool-Stop Eagle II dual compound blocks, as I heard the salmon was pretty effective on steel, and they do the job a lot better. Still not enough braking power to lock the wheel, but a definite improvement and a safer bet when stopping at traffic lights.


 If this bike was being renovated for myself, I'd have had the rims changed over to alloy just for peace of mind (plus a considerable weight saving), but like I mentioned before I was trying to keep the refurb costs to a minimum.  


Not a bad condition considering the age

 The rest of the bike looked in pretty good nick, with only minor surface rust on chromed bits, and no real pitting that didn't come out with some wire wool and WD-40. The mudguards did pit and mark however, and even though they eventually polished up pretty great, they are discoloured in places. The pedals span freely, and although a bit grimy, the chain was in good condition.


 The tyres however, were cracked and needed replacing. For the record, trying to get tyres to fit 26 x 1 1/4 (597) wheels is a ball-ache; the size seems to be a standard for thin city-style 26" steel rims, which is irritatingly similar to the standard for the more common thin city-style 26" alloy rims, which is 26 x 1 3/8 (590). That last number in brackets is the

"The European Tyre and Rim Technical Organisation" (ERTRO) number for the wheel, and measures the diameter of the rim where the tyre's 'bead' sits. 
This means the difference between both thin city-style 26" rims is 7mm in diameter, which is just enough to mean the tyres will look about the right size, until you actually go to fit them (cue the flashback of me trying and failing to wrestle a pair of 590 tyres that I already had onto these rims).
Anyhow, the only 597 tyre I can find is the Raleigh Sport, should you ever need to know.

 I'd already made the decision to replace the teeny tiny stem with something more stretched out and comfortable, so on to stripping the bike down so it can be cleared of surface rust, cleaned, and regreased. 

Harry - a mate of mine who's also interested in bicycle messinaboutin' - came down to lend a hand in a weekend of bike breakdown fun. Because I picked up this bike and the previously mentioned Raleigh at the same time, I stripped down the rusted shitheap/spider-egg-graveyard mixte while he stripped down the Commodore. I feel he got the better end of the deal here.


Here's Harry, the smug bastard. He'd practically finished by the time I'd got my pannier rack off

 Harry stripped everything from the bike, except the forks/headset and the bottom bracket/crankset, and did a bloody good job wire-wooling surface rust off the chrome parts. Then it came to removing the cottered cranks. 


 Cottered cranks are, put simply, bloody stupid. I'm sure more a skilled person than I can swiftly punch out the cotter pins and be on their way, but make no mistake; cottered cranks are bloody stupid.


 Basically the cranks are held to the bottom bracket spindle by a wedge shaped pin (the cotter pin), which is tightened/wedged in place by way of a nut on the threaded end of the cotter pin. To remove the cranks however, you've got to 'unwedge' the cotter pin, which basically means twatting the threaded end of the pin with a hammer until it gives up and falls out. 


 The thing is, cotter pins are stubborn little bastards, and if you've read my previous posts on the Meathead debacle, you'll know that giving me a hammer and saying "have at it" isn't a sensible idea. If the pin isn't hit squarely, the threaded end can bend and deform and you'll have a hard time getting the pin out. In fact, even if the pin is hit squarely (but too hard), the threaded end can mushroom and deform, and you'll have a hard time getting the pin out, or at least you'll have a hard time ever using the pin again.


 We'd tried this cotter pin removal technique at Harry's a week or two before as we stripped down his bronze/orange Hercules 3-speed. We'd failed as we'd been too timid with the hammer and punch. Neither of us wanted to properly have at such a nice frame, however with the Commodore only costing £16, we figured there was less to lose.


 Surprisingly, I managed to hammer the non drive-side pin out in one or two swift knocks, which may have given me and Harry false hope that I was in fact the man for the job, and that the whole Meathead debacle was actually just some bad luck. 


 I quickly put that theory to bed, as I immediately bent the drive side pin... 


 In my defense, with the chainwheel being so close to the pin, it's hard to hit it square on wihtout fear of accidentally clipping the chainwheel's teeth. Either way, the pin was way too bent to remove. So out came the Dremel, and we cut and ground the threaded end off of the pin, so at least it might be a little easier to remove.


By this time, I'd resigned myself from any intricate destruction, so Harry went to work with the Dremel, while I held the beer bike

 After a bit of work with the Dremel, we still couldn't get the pin out, so we managed to nimbly unscrew the bottom bracket cups and remove the whole thing crank and all, so at least if the worst came to the worst, I could just replace the bottom bracket and crankset with another (preferably cotterless!).


 Putting it to one side for the meantime, we spent the next day stripping down, cleaning, greasing and oiling up the Sturmey Archer gear hub. A fun little exercise which actually wasn't as hard as we thought it was going to be, and definitely worth it just so we now know what a working hub should look like, given their popularity in the old town bikes we might come across.


 About a week later, I successfully removed the cotter pin from the drive-side crank (hoorah); I'll go into how in a later post.


 After that, I cleaned and regreased all the bearings in the bike (headset, front wheel, bottom bracket), and replaced the cotter pins with new ones. These new pins had to be filed down to fit because cottered cranks are bloody stupid apparently the cotter pin 'wedge' dimensions were never standardised, so it was all proprietary depending on the crank manufacturer.  


 After replacing the tyres, brake blocks and cables, I used the 70mm stem from the Raleigh Misty, and bought some Humpert Toulouse handlebars and some Ritchey TrueGrips, for a more swept back, porteur look that goes with the classiness of the gold and brass shiny bits. 


 And here he is: Commodore Hazard

 
COMMODOOORRRRRRE! Amazing what a bit of sunshine can do...


Foil's a bit tattered in places, but still nice and shiny


Original SA shifter (with the cracked plastic face plate removed), and original brake levers
  
The brakes and mudguards cleaned and polished up nicely, albeit with some pitting


Gear cable had to be replaced, as did the little adjuster barrel; strangely the original didn't allow cable adjustment

 Well there it is, the Commodore. I can attest that although it's too small a frame for me, it is a fun, cruisery ride, as I rode about 12 miles on it from London Waterloo to Stamford Hill and back last summer. The handlebars are wide and far back, and the big sprung saddle had me bouncing around like I was in The Wild One. 


 I did put it on Ebay last August but it never sold; I'm fairly sure this was down to the high starting price, which was in itself down to the Carradice saddlebag I'd attached to the back that hiked up my price. I've waited till after winter to relist this and the refurbed Raleigh Misty, so hopefully I'll be rid of them in the next few months, and can be back down to John at the GBP for some more tasty money pits vessels...


The Guildford Bike Project

Going back to my first ever post from the March last year, I described the three bikes I owned. What I hadn't included was that a week after that post, I'd bought up two more bikes.

The bike-doing-up bug had caught hold

Somehow, I'd decided I needed yet another bike to mess with. All this bike messinaboutin' was an experience, I'd convinced myself, and one that shouldn't be confined to just the bikes I wanted to ride around; buy cheap, tired old bikes with potential, renovate them, then sell them on whilst learning about how they work in the meantime. 
In fact, the original idea was to buy an old 'vintage' bike (cheap), then do it up (cheap), then start the Ebay bidding at the cost I bought the bike plus the cost of anything I'd added (new cables, brake pads etc). I didn't really care about making a profit, it was more about the experience of playing with old bikes I'd otherwise never own. 

A year later, I've still no idea whether this will pay off, as I er, haven't actually sold any yet...

Nope, the two bikes I just mentioned are about 6ft away from me as I type this. They are looking pretty swell though, albeit after some hefty transformation. My vision of a cheap bike renovation flew out the window about the same time money started leaving my account in lieu of new handlebars and tyres... OK so if they weren't going to be ultra cheap, they'd at least look the shit!!

I bought the bikes from the Ebay arm (naturally) of the Guildford Bike Project. The GBP are a great project that pick up donated, unwanted bikes from the local area and set to doing what I wanted to do but on a grander, more community focused scale; fix the bikes up so they run, then sell them on, whilst trying to teach people something about bike maintenance in the process. 
If I remember rightly, the people getting taught were part of a JobCentre or skills teaching program, whereby they'd learn how to fix and maintain the bikes which would then be sold on. The GBP also pop up at community events in and around Guildford through the year, servicing and selling bikes.
All in all it's a great scheme, especially as it promotes everyday cycling and a DIY skill, as well as providing a way to keep those barely-ridden Apollos and Carreras out of landfill.

I think they were still in their first year back in 2013, as I remember the guy running the show (John), being a little taken aback by the sheer number of bikes that were being donated; their pick-up van was always full, and they had container after container after container of bicycles to be dealt with. So much so that the older, 'vintage' 3 speeds (a completely different breed to the mountain bikes that made up the majority of those donated) were put to one side to be sold-as-seen on Ebay. This suited my needs down to the ground as it's near to my house, and I was even invited by John to bypass Ebay altogether and contact him when I'd renovated and sold the ones I'd just bought (something which I've still to do...). 

Anyway the bikes I bought were a black Halfords Commodore, and a champagne Raleigh Misty; both steel town bikes, both about 30-40 years old, and both in need of some TLC and wire wool (or in the Misty's case, brute force and a lot of leverage to prise the rusted parts off).


Halfords Commodore (1978 I think, if going by the Sturmey Archer hub)


Raleigh Misty mixte frame (the original listing said it was from 1983, but I've no idea where they got that from)

"Sold-as-seen" is always a gamble, but the Misty looked in such a sorry state when I turned up that I was starting to question my recent life choices. It was going to take more than a new set of cables to bring it back from the brink. 
And as much as I love the frames and certain aspects of the two bikes (like the Commodore's brass coloured mudguards, and the Misty's mixte frame shape), I thought the handlebar setups on both bikes were ugly as. The Commodore especially is a small bike to begin with; having such a short, Dutch-style stem meant you could practically steer with your knees! I guess this was about the time the "Cheap Bike Renovation: Exit this way" window started to open...

Sunday, 23 February 2014

The Meathead so far

Moving on from the screwdriver related incident, I set to work on buying more stuff for my Meathead. It's a lot easier now to see what I'm trying to do, which is make to a fat mess; a cruisery monstrosity of a thing with custom built gear shifting, coaster brake, and no cables running across the frame (I want it to be bold and chunky, but tidy and stylish at the same time; like the Incredible Hulk if he got a really smart haircut).

Anyway, this is what it looks like so far:


Awwww yeaaaaaah

I found a Shimano SG7C-20 seven speed internal hub with coaster brake on Ebay, and ordered some Humpert Beach Cruiser handlebars, some cream-coloured BMX grips and a black and white vinyl banana seat (again from Ebay). 


Power shot from the floor to show off its mightiness
 I painted the outer housing of the 7sp hub black, along with some pair of rims I had originally from my work bike (Araya 26 x 1.5 single wall), then laced them up with the Quando front disc hub that came with the Meathead in the first place.


I flipped the bars to try a more 'boardtrack on steroids' thing, but I think having the grips so low might be uncomfortable

This pictures were taken November of last year, and the bike's been sat under my bed since because of other bike projects taking up my time and space. 

Loads of work to do still:
  • Buy or make a sissy bar to support the back of the seat. I really like the idea of using shock absorbers and then some sort of pivot on the front, but I've no idea where to find such soft shocks from for cheap.
  • Find a meaty looking single-ring crankset (Or find a triple-ring set, then make two chain guides to sit on either side).
  • Fix the front disc brake. 
  • Work out a setup for the gear changes, motorbike suicide lever style under the seat (maybe mounted to the V-brake boss?)
  • Find some sexy-fat whitewall or cream balloon tyres.
So not much to do then, really... And that's after sorting out my road bike before spring, and also doing up an old BSA 3-speed that's been sat in my room since May of last year. Not much to do at all...

Thursday, 13 February 2014

"Meathead meets a Meathead head to head"

Back to the ongoing fable of the Raleigh Meathead, our tale takes us back to February of last year...

After spending a lovely sunny day in an office, I couldn't wait to get some beer and sit out in the conservatory, spending the last hours of daylight taking the Raleigh to pieces. 
Walking the bike home last night helped me come to terms with the fact that the frame I loved was decked out in some pretty manky components; the wheels were mismatched and way out of true, the fork suspension was stodgy, and the front disc brake caliper didn't seem to want to grip the disc, no matter how much I pulled at the cable (I'm new to disc brakes and susp. forks by the way, but that was a good reason to get this bike). 


All a bit mingin'

Also the fact that the seatpost was well and truly stuck inside the seat tube was slowly eating away at the dreams I had had for this cruiser. 


Come out of there, you!

 There were a few OK parts on it though, that could be squirelled away in the box marked "Shit I don't need, but can't bring myself to throw away or sell Spares". A Shimano rear derailleur with hyuge jockey wheels, an OK looking front derraileur, and a 7 speed freewheel that looked hardly used.


Bonus Shimano drivetrain stuff in not bad nick

A quick and awkward tumble around the garden told me that yes, the wheels were definitely screwed, and no, the brakes did not work. And so, to tearing it to pieces.


Tub o' junk

 So with everything off the frame except the headset, I set to work on how I was going to remove the seatpost. The internet was full of suggestions for people in similar situations, but none were helpful given the tools I had to hand (basically I didn't have a blowtorch/heat gun to warm the frame up, and I had no idea what Plusgas was).


So ingenuity it was!! Couldn't let a degree in Product Design go to waste; I had to start thinking laterally. 


My inspiration

Uh oh! A stuck seatpost! A really stuck seatpost. We can't pull it out from the top, we can't heat up the sides and slide it out... We'll have to twat it with a hammer!!


The hole in the bottom bracket shell, leading to the seat tube

Through the hole in the bottom bracket shell, I figured I could take a long flathead screwdriver and a mallet, and gently tap the seatpost out from the bottom. 
Starting out was awkward, but eventually after intermittently measuring the distance from the top of the seat tube to the seat post, I realised it was working; the seatpost was coming out.


This picture now makes me wince...

IT'S WORKING! I'M A GENIUS!! AN INGENIUS GENIUS! I'M GONNA START A BLOG SO EVERYONE CAN SEE HOW SMART I AM AT FIXING BIKES!! BLOODY BRILLIANT!! FIRST THOUGH I'M GONNA EXCITEDLY TAKE THE FRAME OUT TO THE BACK GARDEN, LAY IT ON THE GRASS AND GIVE IT A RIGHT THUMP WITH THE MALLET TO HURRY THIS UP!! YAAAAAAY.


Now back to the start of this post, where I described how I went to get beer to aid me in the dismantling process... 
I wasn't drunk, but I do think a couple of beers may have robbed me of a bit of foresight when it came to this enthusiastic decision.  Slow and steady wins the race? Shut your face! It's late and I want to go to bloody bed!

Anyway as you may have guessed, thumping a screwdriver into an aluminium bike frame is exactly as stupid as it sounds, and lo, the screwdriver went through the frame.


"Blimey, this just got a bit difficult! The seatpost must be at a sticking point; I should hit it even harder!" - Gom

So now I have a rectangular hole, about 7mm across, in the seat tube of my frame. 
Structurally, I've no idea how bad this is. It looks bloody awful, and I'm assuming the bottom bracket shell is one of the biggest stress points on the frame; there's a pretty solid chance that I'll stand up on the pedals or go off a curb, and the whole frame will tear open like a tin can. 

Ah well though, live and learn (and curse and spit and froth at the mouth at my own stupidity a year on). I've decided to carry on building the cruiser bike that's in my head, and then ride the absolute shit out of it, hopefully to determine whether it's going to hold. 
The way this bike's going to be used (as said cruiser, with a very laid back position), I don't expect it to take a beating down a trail or whatnot, but I have to be sure.  
If it doesn't hold, I'll have to scrap the frame, but at least I'll have all the other parts, ready to go again. 
I'll probably have to consult some forums, but I'm also toying with the idea of drilling a hole slightly bigger than the rectangular hole that's there now (hear me out!). Hopefully a circular hole will mean the aluminium is less likely to tear open, as it could from the rectangle's corners; as far as I can tell, I think this is standard procedure for stress fractures in alu frames; drilling holes at the ends of the fractures to "nip it in the bud" as it were so the tear doesn't spread.
If anyone reading this has had any experience with something similar, I'd love your input on what to do now; I fear the overall call is "Sean, the frame cost you £6. Stop being an emotional tit and sling it.", but I just find the frame shape a bit too perfect for what I want to just throw it away and start back hunting on ebay. 

Oh, and by the way, I got the seatpost out. Every cloud and that...


So theoretically, my method was successful. Theoretically...